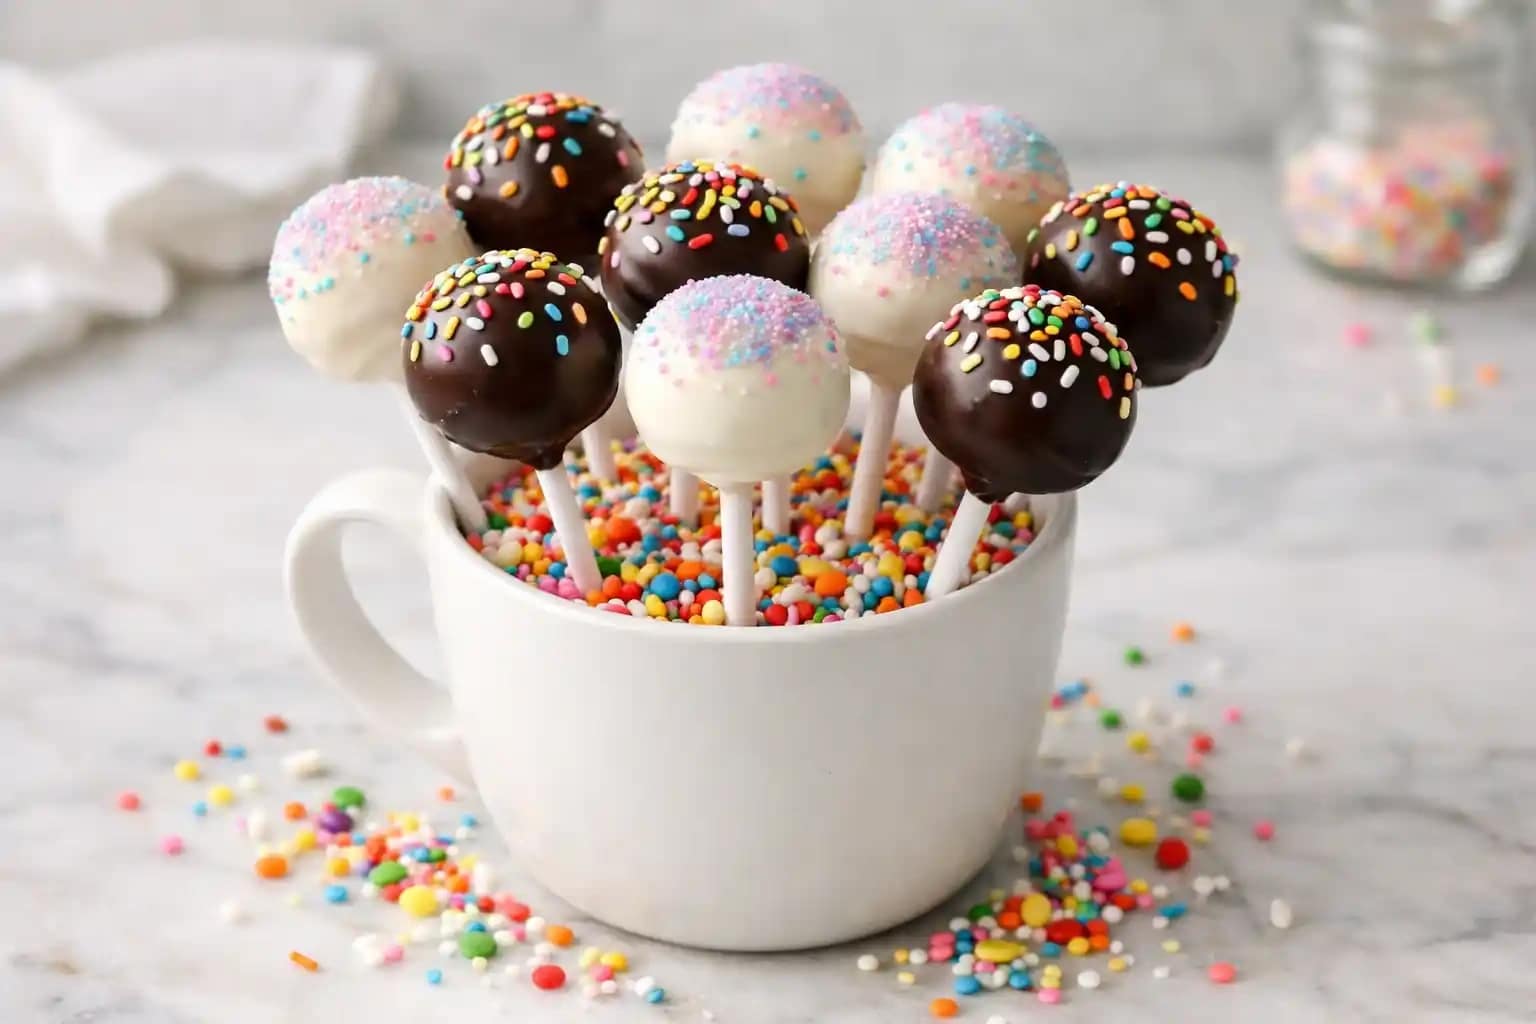
Fun Cake Pops for Parties and Special Occasions
The first time I brought cake pops to a party, three people asked if I’d ordered them from a bakery. I had not. I’d spent about two hours in my kitchen feeling moderately confused, and then suddenly I had thirty perfect little chocolate cake pops on sticks.
This homemade cake pops recipe walks you through every step without assuming you already know what you’re doing. You don’t need a cake pop maker, a candy thermometer, or any professional equipment. You need a bowl, a baking sheet, and a willingness to dip things in chocolate.
What You’ll Need (Ingredients)
Straightforward baking staples plus candy melts or chocolate for coating.
For the cake base:
- 1 box (15.25 ounces) white or chocolate cake mix, plus ingredients listed on the box
- 1/2 cup frosting, store-bought or homemade (vanilla or cream cheese works best)
For the coating:
- 2 cups white chocolate chips or candy melts
- 2 cups milk or dark chocolate chips or candy melts
- 1 tablespoon coconut oil or vegetable shortening per cup of chocolate, for thinning
For decorating:
- rainbow sprinkles
- colored sanding sugar
- mini chocolate chips
- edible glitter or pearl dust
- food coloring gels for tinted white chocolate
Equipment:
- 30 lollipop sticks or paper straws
- styrofoam block or tall glass for drying upright
How to Make It — Full Step-by-Step Process
Step One: Bake and Cool the Cake
Bake the cake mix according to the package directions in a 9×13 inch baking pan, using whatever eggs, oil, and water the box specifies. Let the baked cake cool completely in the pan, which takes about 45 minutes to 1 hour at room temperature. Don’t rush this cooling step, since warm cake crumbles unevenly and produces a greasy, dense mixture rather than a workable dough.
Once fully cooled, crumble the entire cake into a large mixing bowl by hand, breaking it into fine, even crumbs with no large chunks remaining. Run your fingers through it a few times to check for any bigger pieces, since lumps create uneven cake pops that crack during dipping later.
Step Two: Add Frosting and Mix
Add 1/2 cup of frosting to the cake crumbs and mix together using a spatula or your hands until the mixture holds together when pressed into a ball. Start with the full 1/2 cup but hold back slightly if the mixture already feels moist and cohesive after a few stirs.
Have you ever added too much frosting and ended up with a sticky, overly sweet mess that falls apart on the stick? The right consistency feels like firm playdough, not like paste. It should hold a ball shape cleanly without cracking but shouldn’t feel wet or tacky against your palm.
Step Three: Roll the Balls
Scoop the mixture using a small cookie scoop or a tablespoon and roll each portion between your palms into a smooth, even ball roughly the size of a large marble, about 1 to 1.25 inches in diameter. Place each finished ball onto a parchment-lined baking sheet as you go.
Keeping the balls consistent in size matters more than people expect, since differently sized cake pops dry at different rates during dipping and look noticeably uneven on a display. IMO, using a cookie scoop for the initial portion and then finishing by hand gives the most consistent result across all thirty.
Step Four: First Chill
Place the tray of rolled cake balls into the freezer for 15 minutes, or the refrigerator for 30 minutes. The balls need to feel firm and cold before you insert the sticks, since room-temperature cake balls are too soft to stay on the stick during dipping without sliding or falling off entirely.
After chilling, the balls should feel solid when pressed with a fingertip. They don’t need to be frozen solid, just firm enough to hold their shape under the weight of the melted chocolate coating that comes in the next steps.
Step Five: Melt the Coating and Attach the Sticks
Melt 2 cups of chocolate chips or candy melts in a microwave-safe bowl in 30-second intervals, stirring between each one, until completely smooth. Add 1 tablespoon of coconut oil or shortening and stir until fully incorporated. The melted coating should look glossy and flow easily off a spoon without being watery.
Dip the tip of each lollipop stick about 1 cm deep into the melted chocolate, then push it gently into the center of a chilled cake ball, going about halfway through but not poking out the other side. The chocolate on the stick sets quickly against the cold cake and acts like glue, anchoring the stick firmly before you dip the whole pop.
Step Six: Second Chill
Return the tray of stick-inserted cake pops to the freezer for another 15 minutes. This second chill sets the anchoring chocolate completely and ensures the sticks stay firmly in place when you apply the full coating dip. FYI, skipping this second chill is the most common reason cake pops slide off their sticks mid-dip.
While the pops chill, prepare your dipping setup. Set out your styrofoam block or tall glass for drying pops upright. Pour your melted chocolate into a deep, narrow container like a tall mug or a deep bowl, since a wide shallow bowl makes it much harder to fully submerge each pop cleanly in one smooth motion.
Step Seven: Dip and Decorate
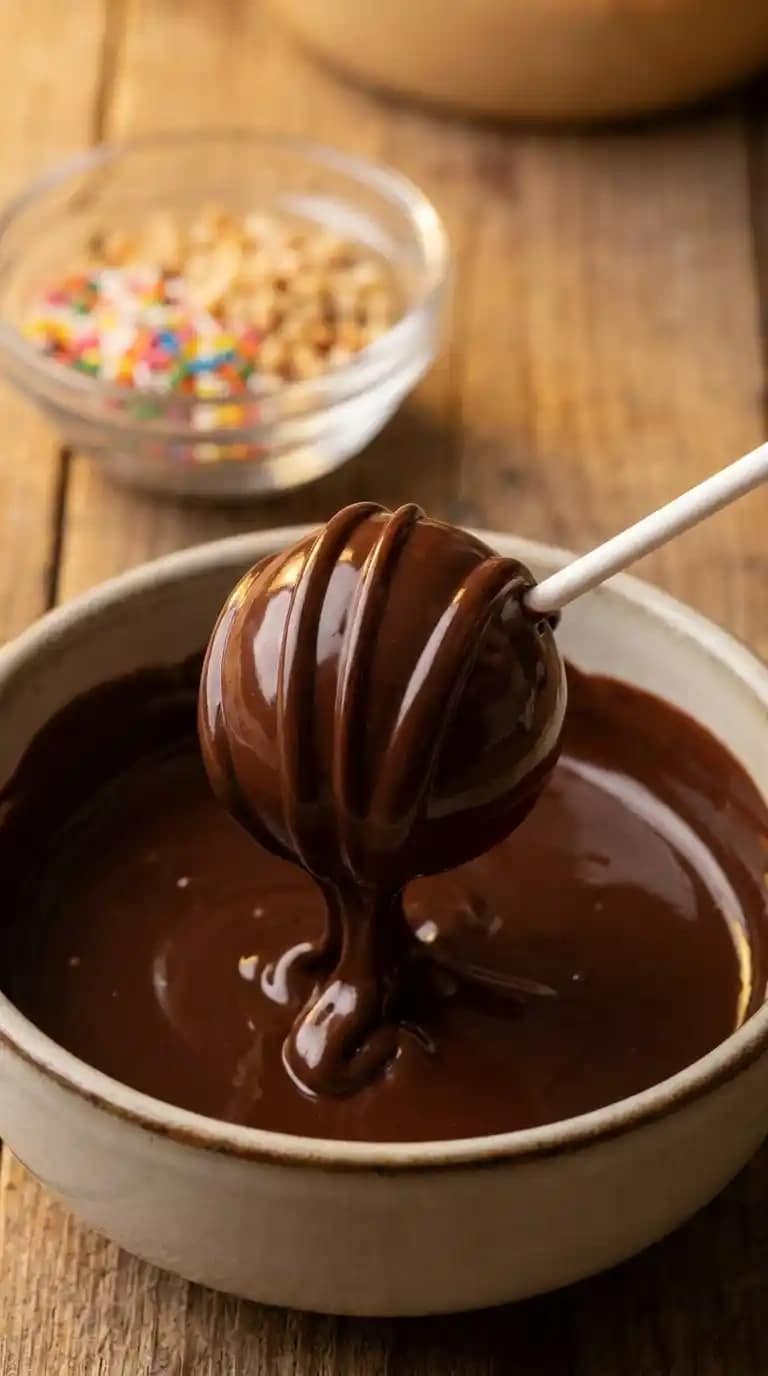
Remove the chilled cake pops from the freezer and work in small batches of 5 to 6 at a time, returning the rest to the fridge while you work. Hold each pop by the stick and lower it straight down into the melted chocolate until the entire cake ball disappears below the surface. Lift it straight back up in one smooth motion without swirling or rotating.
Hold the dipped pop horizontally and rotate it slowly to let the excess chocolate drip off the bottom rather than pooling around the stick. Tap the stick gently against your wrist if needed to release stubborn drips. Add your sprinkles, colored sugar, or other cake pops designs decorations immediately while the coating is still wet, since the chocolate sets fast and dry decorations won’t stick to a hardened surface. Stand each finished pop upright in the styrofoam block to set completely.
Cake Pop Flavors Worth Trying
Chocolate Cake Pops
Use a chocolate cake base with chocolate frosting and dip in dark chocolate coating for an intensely rich, full chocolate experience. Roll in crushed Oreos or mini chocolate chips before the coating sets for extra texture.
Funfetti and Vanilla
White cake with vanilla frosting and white chocolate coating makes the perfect canvas for fun cake pops dressed up with rainbow sprinkles and pastel candy melts. These work beautifully as birthday party cake pops ideas for kids.
Red Velvet
Use a red velvet box cake with cream cheese frosting and white chocolate coating for a visually dramatic and delicious combination. The cream cheese frosting pairs especially well with red velvet’s mild cocoa flavor.
No Bake Cake Pops Option
Skip the baking entirely by blending 2 cups of crushed Oreos with 4 ounces of softened cream cheese until combined. Roll, chill, and dip exactly the same way as the baked version for a quick no bake cake pops alternative that works beautifully as easy dessert recipes for last-minute occasions.
Common Mistakes to Avoid
Adding too much frosting: This makes the mixture sticky and heavy, causing cake pops to slide off sticks during dipping. Start with less than you think you need.
Skipping either chill period: Both chill stages serve a specific purpose. The first firms the balls for stick insertion, and the second sets the anchor. Neither is optional.
Using shallow melting bowls: Wide, shallow bowls make full submersion nearly impossible and produce patchy, uneven coating. Use a deep, narrow container for the cleanest dip.
Decorating too late: Sprinkles and decorations must go on immediately after dipping while the coating is still wet. Waiting even 30 seconds too long means they won’t stick.

Fun Cake Pops for Parties and Special Occasions
30
servings30
minutes1
hour20
minutesThese homemade cake pops combine crumbled baked cake and frosting rolled into balls, chilled firm, dipped on lollipop sticks in melted chocolate, and decorated with sprinkles or colored sugar. Ready in under two hours with endless flavor variations, they deliver bakery-quality results with no special equipment required.
Ingredients
For the cake base:
1 box white or chocolate cake mix, plus ingredients listed on the box
1/2 cup frosting, store-bought or homemade
For the coating:
2 cups white chocolate chips or candy melts
2 cups milk or dark chocolate chips or candy melts
1 tablespoon coconut oil or shortening per cup of chocolate
For decorating:
rainbow sprinkles
colored sanding sugar
mini chocolate chips
edible glitter or pearl dust
food coloring gels for tinted white chocolate
Directions
- Bake the cake mix in a 9×13 pan according to package directions and cool completely
- Crumble the cooled cake into fine, even crumbs in a large bowl
- Add 1/2 cup of frosting and mix until the mixture holds together like firm playdough
- Scoop and roll into 30 even balls about 1 to 1.25 inches in diameter
- Place on a parchment-lined baking sheet and freeze for 15 minutes until firm
- Melt the chocolate with coconut oil in 30-second microwave intervals until smooth
- Dip the tip of each lollipop stick into the melted chocolate and insert halfway into each chilled ball
- Return the tray to the freezer for another 15 minutes to set the anchoring chocolate
- Prepare a styrofoam block or tall glass for drying pops upright
- Pour melted chocolate into a deep, narrow container for dipping
- Working in batches of 5 to 6, dip each pop straight down into the chocolate until fully submerged
- Lift straight up and rotate slowly to let excess chocolate drip off
- Add sprinkles or decorations immediately while the coating is still wet
- Stand each finished pop upright in the styrofoam block to set completely
FAQs
Q1: Why do my cake pops crack after dipping?
Cracking usually happens when the cake balls are too cold going into the warm chocolate, causing the coating to contract as it sets. Let frozen pops sit at room temperature for 2 to 3 minutes before dipping to reduce the temperature shock.
Q2: Can I make cake pops without lollipop sticks?
Yes, simply roll and dip them without sticks for bite-sized cake truffles instead. They taste identical and actually require less setup for casual food ideas gatherings where presentation isn’t the priority.
Q3: What’s the best chocolate for dipping?
Candy melts designed specifically for dipping produce the smoothest, most consistent coating and set faster than regular chocolate chips. Regular chocolate chips work well too but need more shortening added to reach the right dipping consistency.
Q4: How far ahead can I make cake pops?
Make them up to 5 days ahead and store in an airtight container in the fridge, or freeze for up to 6 weeks. Bring to room temperature for about 15 minutes before serving for the best texture.
Q5: Can I color white chocolate for cake pops designs?
Yes, use oil-based or gel food coloring specifically designed for chocolate. Water-based food coloring causes chocolate to seize and turn grainy instantly, which ruins the entire batch.
Q6: How do I thin chocolate that’s too thick for dipping?
Stir in coconut oil or vegetable shortening one teaspoon at a time until the chocolate flows smoothly off a spoon. Avoid adding water or milk, since even a small amount seizes chocolate immediately.
Wrapping It Up
This cakepops recipe delivers thirty perfectly coated, genuinely impressive homemade cake pops through careful mixing, two essential chill stages, a proper deep-dip technique, and immediate decoration. Get the consistency right, respect both chill periods, use a deep dipping container, and decorate fast. Those four habits separate clean, professional-looking pops from the cracked, sliding disasters everyone’s had at least once.
Whether you make classic chocolate cake pops, funfetti party versions, or quick no-bake truffles, these deliver every time. Now go crumble that cake and start rolling.