Single Serve Desserts Starting With This Mug Cake
It’s 10pm. You want cake. You don’t want to bake a cake, wait for a cake, or share a cake with anyone. This is the recipe that was invented for exactly that moment, and I use it more than I’d like to publicly admit.
This best mug cake recipe produces a genuinely moist, properly chocolatey single-serve cake in about two minutes of microwave time with ingredients you already have in your kitchen. No mixer, no baking sheet, no cleanup beyond one mug and one fork. Single serve desserts don’t get more efficient or more satisfying than this.
What You’ll Need (Ingredients)
Everything fits in the mug you’re about to eat out of. That’s genuinely the whole system.
For the chocolate mug cake:
- 4 tablespoons all-purpose flour
- 4 tablespoons granulated sugar
- 2 tablespoons unsweetened cocoa powder
- 1 large egg
- 3 tablespoons whole milk
- 3 tablespoons vegetable oil or melted butter
- 1/4 teaspoon vanilla extract
- 1/4 teaspoon baking powder
- pinch of salt
- 2 tablespoons chocolate chips, optional but strongly recommended
Optional toppings:
- 1 tablespoon peanut butter, pressed into the center before microwaving
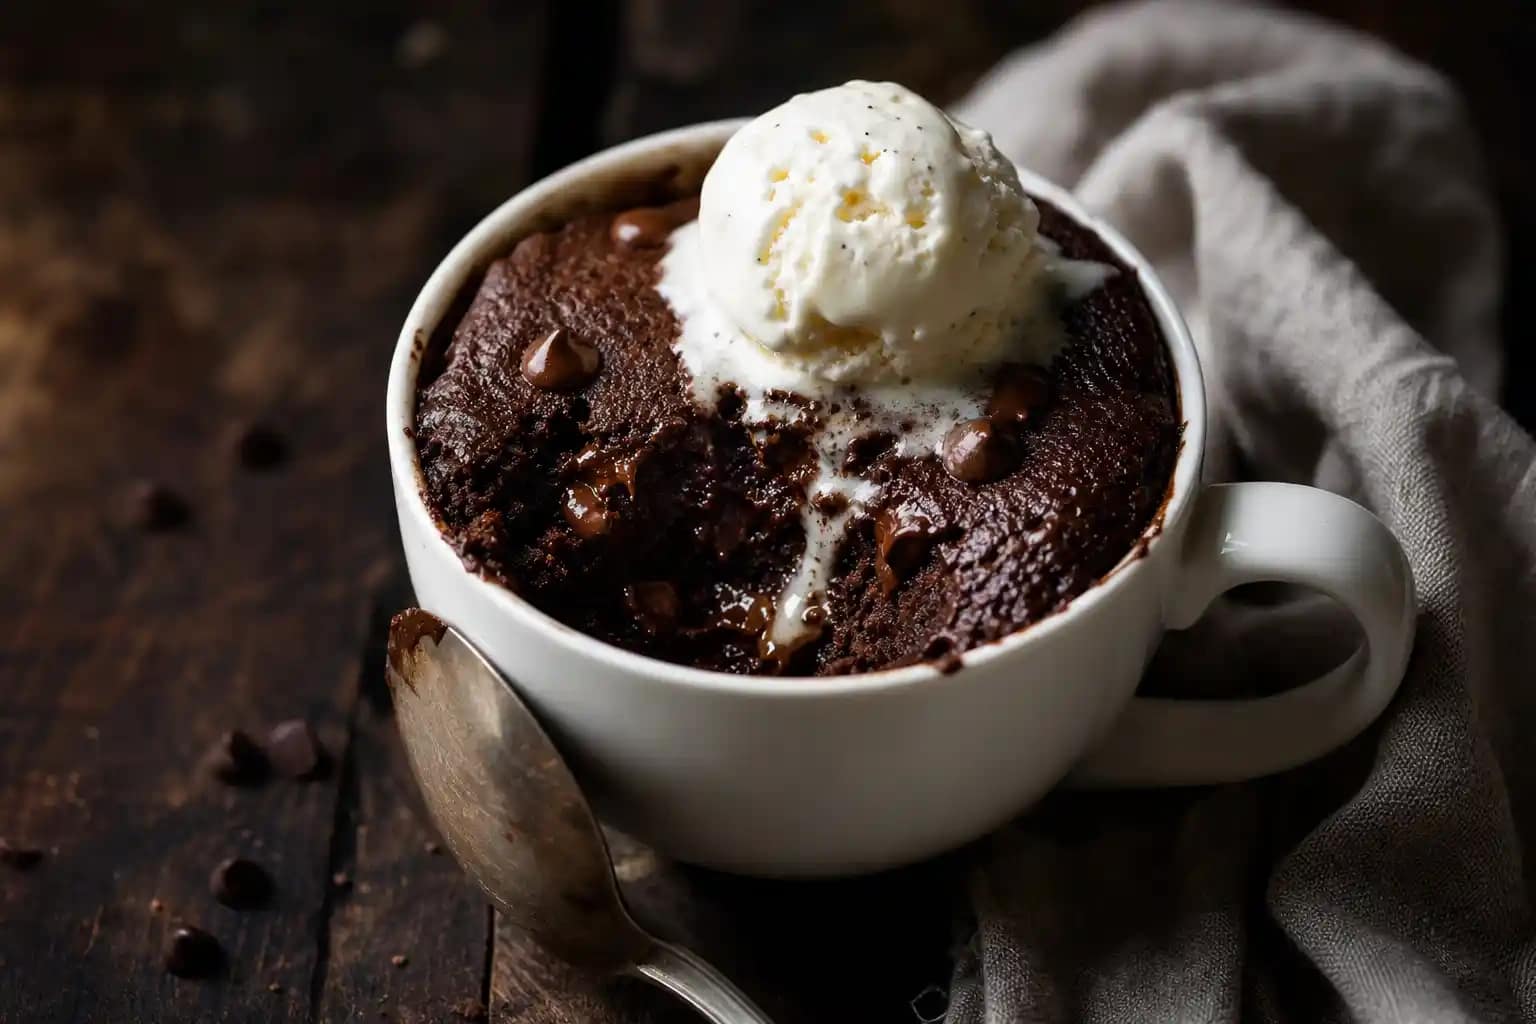
- a scoop of vanilla ice cream
- whipped cream and a pinch of sea salt
How to Make It — Full Step-by-Step Process
Step One: Choose the Right Mug
Select a microwave-safe mug that holds at least 12 ounces, since the cake rises significantly during cooking and a small mug causes the batter to overflow and create a mess on the microwave turntable. A wider, shorter mug actually works better than a tall, narrow one because it cooks the batter more evenly throughout.
FYI, ceramic mugs work better than plastic ones since they distribute microwave heat more consistently. Run your finger around the inside of your mug before starting and make sure it feels smooth with no chips or cracks that might affect cooking or safety.
Step Two: Combine the Dry Ingredients
Add 4 tablespoons of flour, 4 tablespoons of granulated sugar, 2 tablespoons of cocoa powder, 1/4 teaspoon of baking powder, and a pinch of salt directly into the mug. Stir the dry ingredients together with a fork until the cocoa powder distributes evenly through the flour and sugar with no visible clumps remaining.
Have you ever made a mug cake and bitten into a pocket of bitter, unmixed cocoa powder? That happens from skipping this dry ingredient mixing step. Spending 15 seconds stirring the dry ingredients first prevents that unpleasant surprise completely and produces a more consistent texture throughout.
Step Three: Add the Wet Ingredients
Add 1 egg, 3 tablespoons of whole milk, 3 tablespoons of vegetable oil or melted butter, and 1/4 teaspoon of vanilla extract directly into the mug on top of the dry ingredients. Mix everything together thoroughly with a fork, scraping down the sides and the bottom of the mug to make sure no dry pockets of flour or cocoa remain hiding at the bottom.
The batter should look smooth, slightly glossy, and uniform throughout with no visible streaks of unmixed flour. Using butter instead of oil produces a richer flavor, while oil produces a slightly moister texture that holds up better if the cake sits for a few minutes before eating. Both options work well, so choose based on what’s most convenient.
Step Four: Add Mix-Ins and Toppings
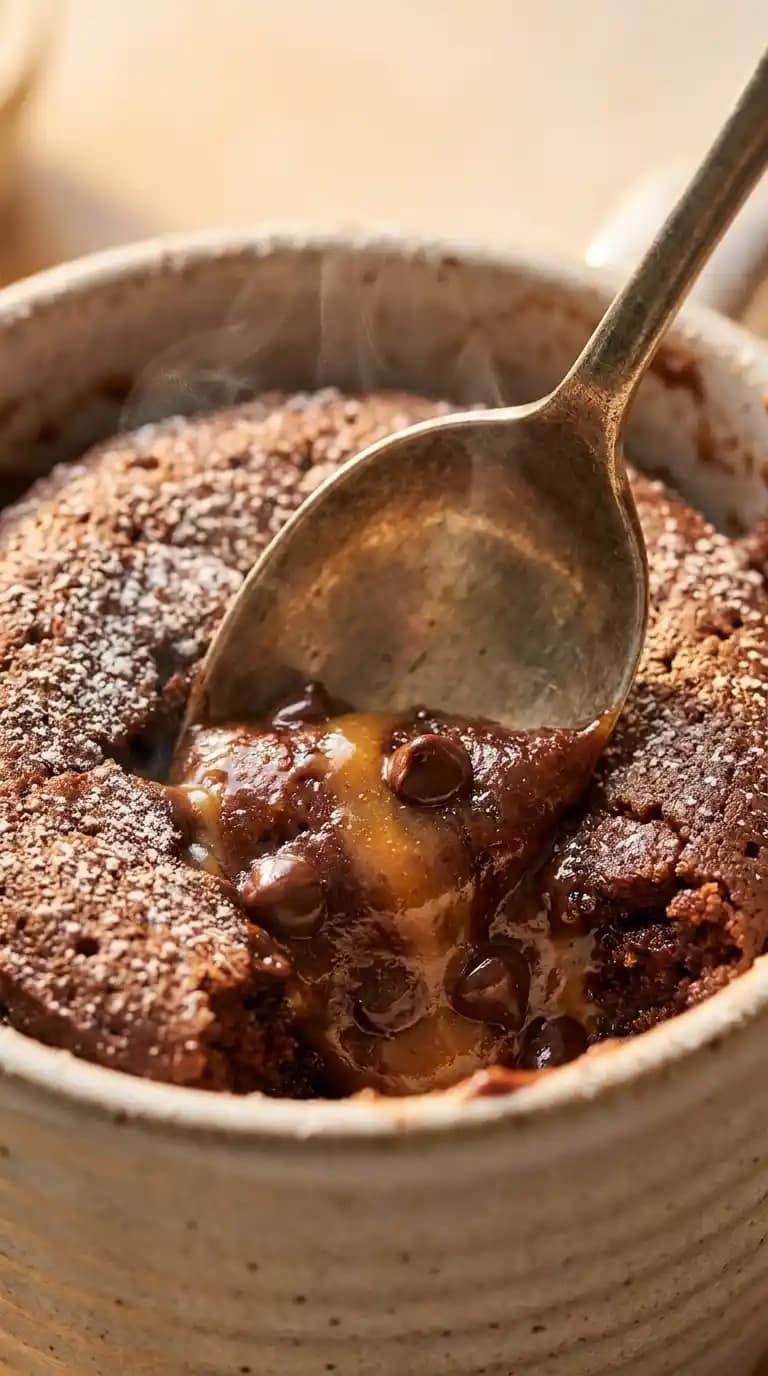
Stir in 2 tablespoons of chocolate chips if using, folding them through the batter so they distribute throughout rather than sinking to one spot. Chocolate chips in the center of a mug cake melt during cooking and create a molten, gooey pocket that transforms a simple mug cakes microwave easy recipe into something genuinely indulgent.
For a peanut butter center, don’t stir it in. Instead, spoon the tablespoon of peanut butter into the center of the batter and press it about halfway down without mixing. The peanut butter stays in a concentrated pocket during cooking and creates a warm, soft center when you eat through the outside of the cake.
Step Five: Microwave at the Right Power and Time
Place the mug in the center of the microwave and cook on full power for 60 to 90 seconds. Start checking at 60 seconds rather than going straight to 90, since microwave wattages vary significantly between models. A 1000-watt microwave cooks this cake fully in about 70 to 75 seconds, while a lower-wattage model needs closer to 90 seconds.
The cake is done when the top looks set and doesn’t jiggle when you gently shake the mug, but might still look slightly moist in the very center. That slightly underdone center is intentional, since it continues cooking from residual heat for about 30 seconds after the microwave stops and produces a fudgier, more dessert-like texture than a fully cooked, drier result.
Step Six: Rest, Top, and Eat
Let the mug sit for 60 to 90 seconds after the microwave stops before eating. The residual heat finishes the cooking and the brief rest allows the cake to settle into its final texture rather than being a wet, unstable mass right out of the microwave. This is genuinely the hardest part of the whole recipe and also the most important.
Add your toppings immediately while the cake is still warm. A scoop of cold vanilla ice cream melting over a hot mug cake produces one of the most straightforwardly satisfying easy dessert recipes combinations available at any hour. Eat directly from the mug without ceremony, since that’s exactly what this recipe is designed for.
Flavor Variations for Every Craving
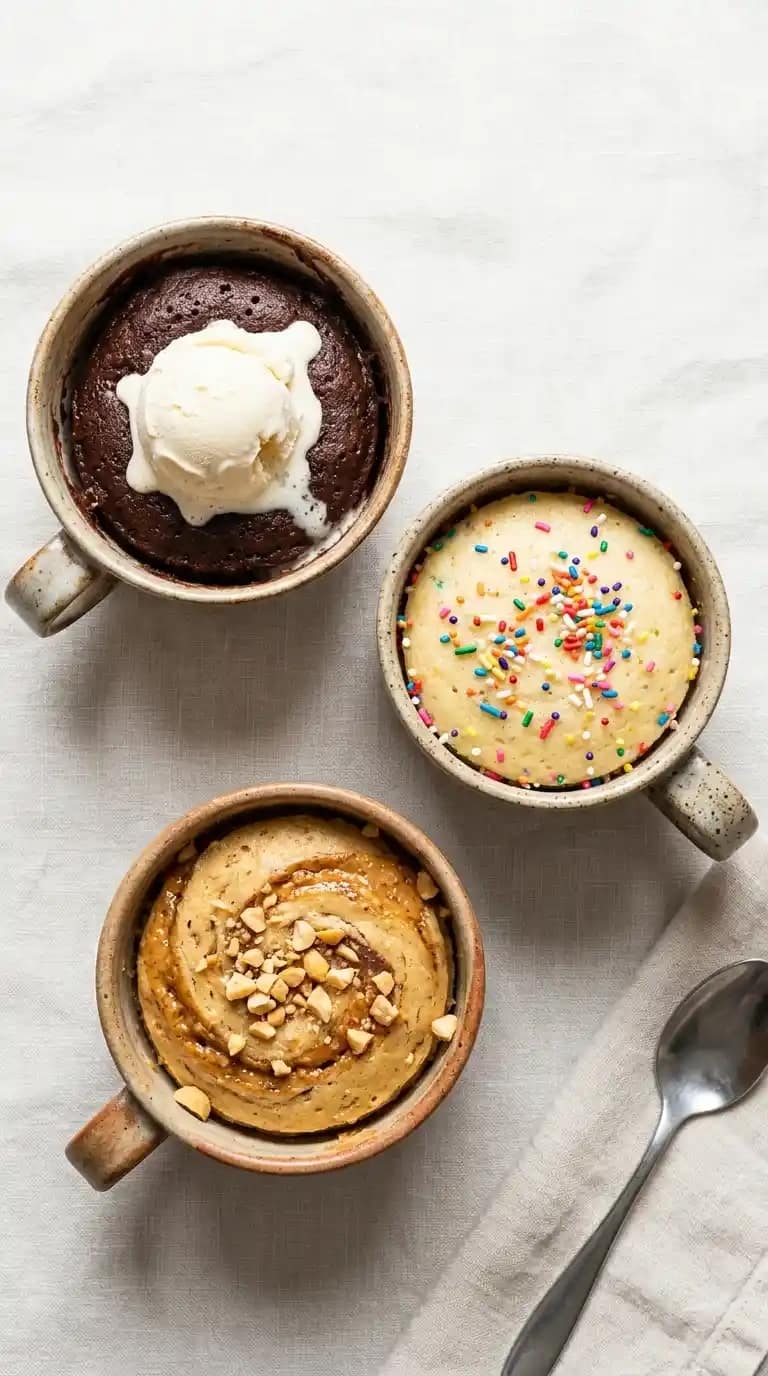
Healthy Mug Cake Version
Swap the all-purpose flour for 4 tablespoons of almond flour and replace the granulated sugar with 2 tablespoons of maple syrup or honey for a healthy mug cake that cuts refined carbs without sacrificing the chocolatey satisfaction. Use almond milk instead of whole milk and coconut oil instead of vegetable oil to keep everything dairy-free.
The texture turns out slightly denser than the classic version but still genuinely satisfying as single serve desserts go when you want something that doesn’t feel entirely indulgent.
Cookie Mug Cake
Skip the cocoa powder entirely and add 1 extra tablespoon of flour, 2 tablespoons of brown sugar instead of white, a pinch of cinnamon, and 3 tablespoons of chocolate chips for a cookie mug cake that tastes exactly like a warm chocolate chip cookie in cake form. This is IMO the most crowd-pleasing variation for people who find straight chocolate cake too intense.
Vanilla Mug Cake
Replace the cocoa powder with 1 extra tablespoon of flour for a simple mug cake with vanilla flavor as the star. Add 1/2 teaspoon of vanilla extract and a tablespoon of rainbow sprinkles for a funfetti version that tastes genuinely celebratory at any hour. Top with a spoonful of cream cheese frosting for a birthday cake energy that makes any Tuesday feel more festive.
Mug Cake Ideas Beyond the Basics
Have you ever considered using mug cake ideas as a late-night baking substitute that actually satisfies the craving without the commitment? That’s precisely what this format does well.
Mug recipes dessert formats work for much more than chocolate cake too. A lemon mug cake uses lemon zest and lemon juice in place of the cocoa. A cinnamon roll mug cake uses brown sugar, cinnamon, and a cream cheese drizzle on top. A brownie mug cake uses extra cocoa and slightly less flour for a fudgier, denser result that sits between cake and brownie territory.
Common Mistakes to Avoid
Overfilling a small mug: Batter expands significantly during microwaving and overflows a mug that’s too small, making a mess and wasting cake. Always use a mug that holds at least 12 ounces.
Overcooking: A dry, rubbery mug cake is the result of even 15 to 20 extra seconds in the microwave. Start checking at 60 seconds and stop the moment the top looks set.
Skipping the resting time: Eating the cake immediately out of the microwave produces a wet, unfinished texture. The 60 to 90 second rest makes a noticeable difference.
Not mixing the dry ingredients first: Unmixed pockets of cocoa powder or baking powder create inconsistent flavor and texture in the finished cake. Always stir the dry ingredients before adding the wet ones.

Single Serve Desserts Starting With This Mug Cake
1
servings3
minutes1
minuteThis chocolate mug cake combines flour, cocoa, sugar, egg, milk, oil, and vanilla in a microwave-safe mug and cooks in 60 to 90 seconds for a single-serve chocolate dessert. Optional chocolate chips create a gooey center, and a brief rest after microwaving ensures the perfect moist, fudgy texture every time.
Ingredients
For the chocolate mug cake:
4 tablespoons all-purpose flour
4 tablespoons granulated sugar
2 tablespoons unsweetened cocoa powder
1 large egg
3 tablespoons whole milk
3 tablespoons vegetable oil or melted butter
1/4 teaspoon vanilla extract
1/4 teaspoon baking powder
pinch of salt
2 tablespoons chocolate chips, optional
Optional toppings:
1 tablespoon peanut butter, pressed into center before microwaving
vanilla ice cream
whipped cream and sea salt
Directions
- Select a microwave-safe mug that holds at least 12 ounces
- Add flour, sugar, cocoa powder, baking powder, and salt to the mug
- Stir the dry ingredients together with a fork until evenly combined with no cocoa clumps
- Add the egg, milk, oil or melted butter, and vanilla extract to the mug
- Mix everything together thoroughly with a fork, scraping the sides and bottom of the mug
- Stir in chocolate chips if using, or press peanut butter into the center without mixing
- Place the mug in the center of the microwave
- Microwave on full power for 60 seconds and check if the top looks set
- Cook for an additional 10 to 30 seconds if the top still looks wet and jiggly
- Remove from the microwave and let rest for 60 to 90 seconds
- Add toppings immediately while the cake is still warm
- Eat directly from the mug
FAQs
Q1: Can I make a mug cake without an egg?
Yes, replace the egg with 3 tablespoons of unsweetened applesauce or 2 tablespoons of Greek yogurt. The texture turns out slightly denser and less structured than the egg version but still tastes genuinely satisfying as easy microwave recipes go.
Q2: Why did my mug cake turn out rubbery?
Overcooking is almost always the cause. Even 10 to 15 extra seconds produces a rubbery, tough texture in a mug cake. Start checking at 60 seconds and aim for slightly underdone rather than fully set.
Q3: Can I use a different flour?
Yes, almond flour, oat flour, and coconut flour all work with slight adjustments to liquid quantities. Coconut flour absorbs significantly more liquid, so use only 2 tablespoons and increase the milk by 1 tablespoon.
Q4: How do I make the mug cake more moist?
Add an extra tablespoon of oil or butter, slightly undercook by 10 seconds, and let it rest longer before eating. Sour cream or Greek yogurt added in place of 1 tablespoon of milk also adds noticeable moisture.
Q5: Can I make mug cakes in the oven instead of the microwave?
Yes, bake in an oven-safe ramekin at 350°F for 12 to 15 minutes. The texture turns out slightly more cake-like and less fudgy than the microwave version but works well if you prefer conventional baking.
Q6: What toppings work best on a mug cake?
Vanilla ice cream, whipped cream, peanut butter drizzle, crushed Oreos, and chocolate sauce all work beautifully. The warm cake and cold ice cream combination specifically produces the best contrast and genuinely elevates a simple mug cake into something special.
Wrapping It Up
This simple mug cake recipe delivers a genuinely satisfying single-serve chocolate dessert in under five minutes through proper dry ingredient mixing, thorough wet ingredient blending, the right mug size, careful microwave timing, and a mandatory rest period before eating. Mix dry ingredients first, combine everything thoroughly, use a large enough mug, stop at 60 to 90 seconds, and rest before digging in. Those habits make every mug cake a success.
Whether you go classic chocolate, cookie-style, healthy almond flour, or vanilla with sprinkles, this format consistently delivers. Now grab that mug and stop resisting the 10pm dessert craving. You’ve earned it.