Birthday Dessert Ice Cream Cake Everyone Loves
I stopped buying ice cream cakes from the store the year I realized homemade ones taste genuinely better and cost about a third of the price. That was several years and a lot of frozen cakes ago.
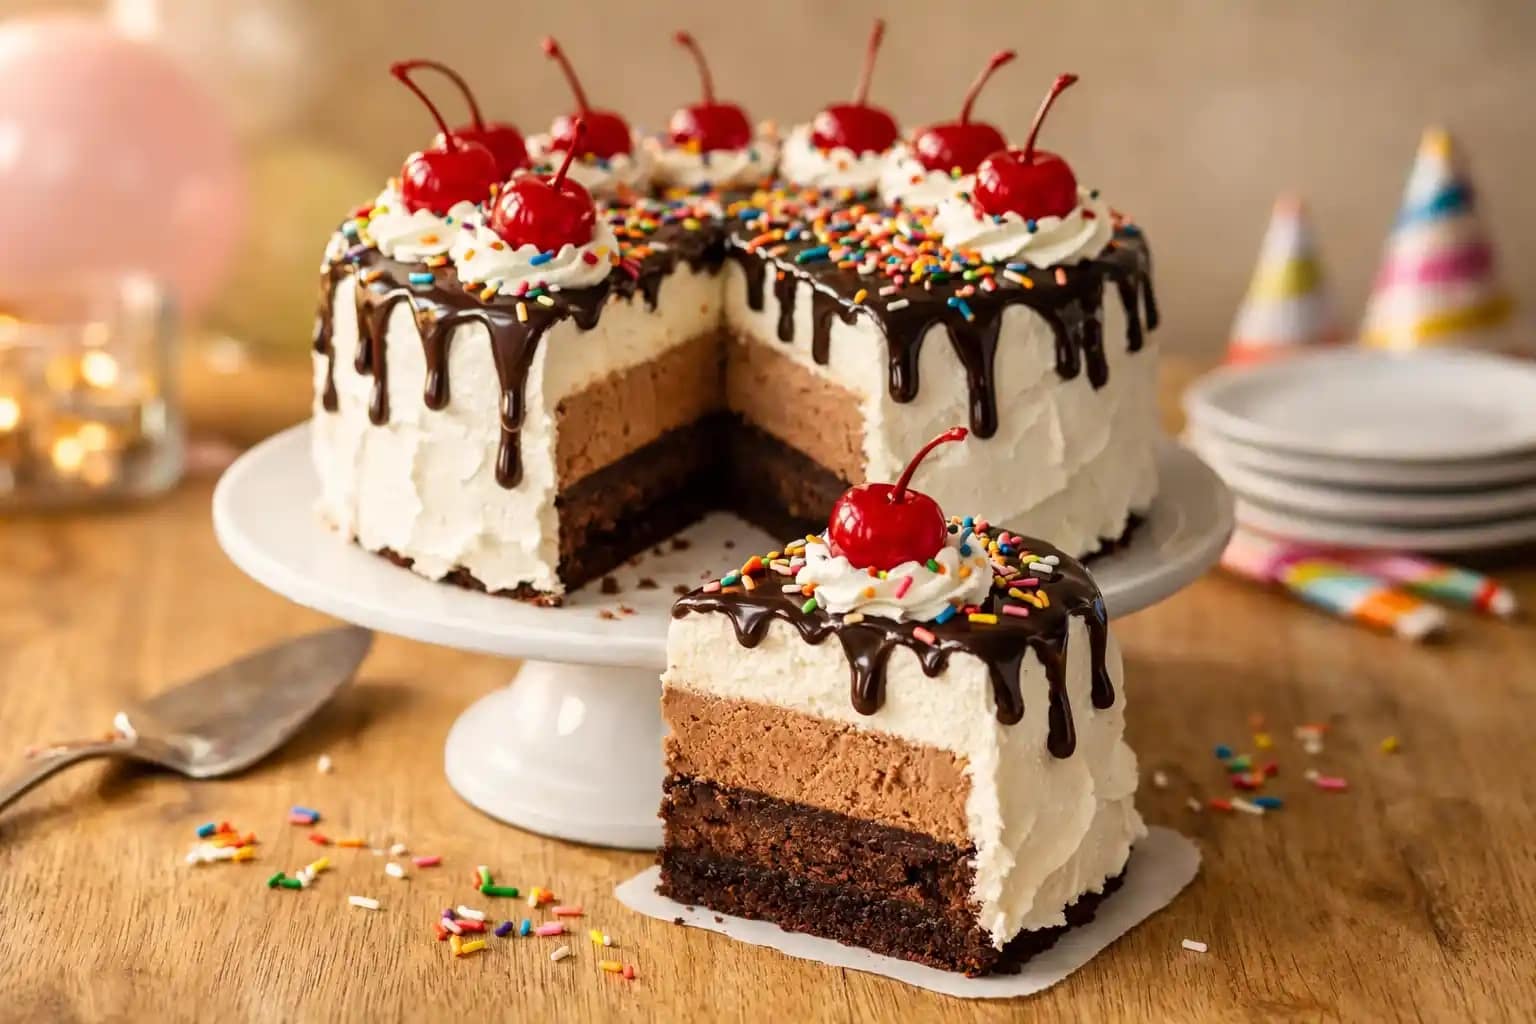
This home made ice cream cake layers a fudgy brownie base, two contrasting ice cream flavors, a chocolate fudge ripple, and a whipped cream topping that holds its shape beautifully for hours. It looks like a professional bakery creation. It requires zero baking skill beyond making a box of brownies.
What You’ll Need (Ingredients)
Flexible, fun, and totally customizable depending on your favorite ice cream flavors.
For brownie base:
- 1 box (18 ounces) brownie mix, plus ingredients listed on the box
- cooking spray for the pan
Ice cream layers:
- 1.5 quarts vanilla ice cream, softened
- 1.5 quarts chocolate ice cream, softened
- 1/2 cup hot fudge sauce, warmed slightly
For the whipped topping:
- 2 cups heavy whipping cream
- 3 tablespoons powdered sugar
- 1 teaspoon vanilla extract
For decoration:
- 1/4 cup hot fudge sauce, for drizzling
- rainbow sprinkles or crushed Oreos
- maraschino cherries
- chopped nuts, optional
How to Make It — Full Step-by-Step Process
Step One: Bake and Cool the Brownie Base
Prepare the brownie mix according to the package directions and bake in a greased 9-inch springform pan for the best results. A springform pan makes removing and slicing the finished cake dramatically easier than a regular round pan or a 9×13 dish. Grease the pan generously and press a parchment paper circle into the bottom before pouring in the batter.
Bake the brownies until a toothpick inserted into the center comes out with a few moist crumbs rather than completely clean, since slightly underdone brownies stay softer after freezing instead of turning rock hard. Let the brownie base cool completely in the pan, which takes about 45 minutes to 1 hour at room temperature. Don’t add any ice cream until the base feels completely cool to the touch, since residual warmth melts the ice cream unevenly.
Step Two: Soften the Ice Cream Correctly
Remove the vanilla ice cream from the freezer and let it sit at room temperature for 8 to 12 minutes until it looks slightly softened around the edges but still holds its shape in the center. You want it soft enough to spread smoothly without tearing the brownie base underneath, but not so melted that it pools into a liquid rather than a spreadable layer.
FYI, the correct softness feels like very firm peanut butter when you press a spoon into the container. If it starts looking shiny or liquid around the edges, it’s gone too far and needs a few minutes back in the freezer before you use it.
Step Three: Add the First Ice Cream Layer
Scoop the softened vanilla ice cream onto the cooled brownie base in large dollops distributed evenly across the surface. Use an offset spatula or the back of a large spoon to spread it into an even layer about 1 to 1.5 inches thick, working from the center outward to the edges of the pan. Press gently to eliminate any air pockets between the ice cream and the brownie base.
Smooth the top as evenly as possible, since a lumpy first layer makes the second layer uneven and creates visible gaps in the finished cake when sliced. Drizzle the warmed hot fudge sauce over the vanilla layer in a thin, even ripple. The hot fudge doesn’t need to cover the entire surface, just create ribbons of chocolate that add a surprise flavor layer between the two ice creams.
Step Four: Freeze the First Layer
Cover the pan loosely with plastic wrap and place it flat in the freezer for 1 hour until the vanilla layer feels completely firm when pressed gently with a fingertip. Don’t skip this freezing step between layers, since adding the second ice cream flavor on top of a soft first layer causes them to blend together at the border rather than staying as distinct, visible layers in the finished cake.
Use this hour to let the chocolate ice cream soften at room temperature, following the same process as the vanilla. Check it at the 8-minute mark and put it back in the freezer briefly if it softens faster than expected.
Step Five: Add the Chocolate Ice Cream Layer
Remove the pan from the freezer and check that the vanilla and fudge layer feels completely firm before proceeding. Scoop and spread the softened chocolate ice cream directly on top of the firm vanilla layer, using the same technique as before: large dollops distributed evenly, then smoothed with an offset spatula from center to edges.
Smooth the top as flat and even as possible, since this surface becomes the base for the whipped cream topping later. A level chocolate layer produces a cleaner, more professional-looking finished cake than an uneven one. Cover the pan again with plastic wrap, pressing it gently against the ice cream surface to prevent ice crystals from forming on the top layer.
Step Six: Freeze Until Completely Solid
Return the covered pan to the freezer for a minimum of 4 hours, though overnight freezing produces a more completely solid result that’s significantly easier to unmold, frost, and slice cleanly. Have you ever tried to frost an ice cream cake that wasn’t frozen through completely? The whole thing slides and melts faster than you can work, which is exactly as frustrating as it sounds.
While the cake freezes completely, make the whipped cream topping. Beat 2 cups of cold heavy whipping cream with 3 tablespoons of powdered sugar and 1 teaspoon of vanilla extract on high speed until firm peaks form. Refrigerate the finished whipped cream until you’re ready to use it, which can be up to 24 hours ahead.
Step Seven: Unmold and Frost the Cake
Remove the cake from the freezer and run a thin sharp knife around the inside edge of the springform pan before releasing the latch. The cake should release cleanly onto a flat serving plate or cake board. Work quickly from this point, since the ice cream softens fast at room temperature.
Spread the whipped cream over the entire top surface and down the sides of the cake using an offset spatula, creating an even coat all around. Return the frosted cake to the freezer for 30 minutes to firm the whipped cream layer before decorating.
Step Eight: Decorate and Serve
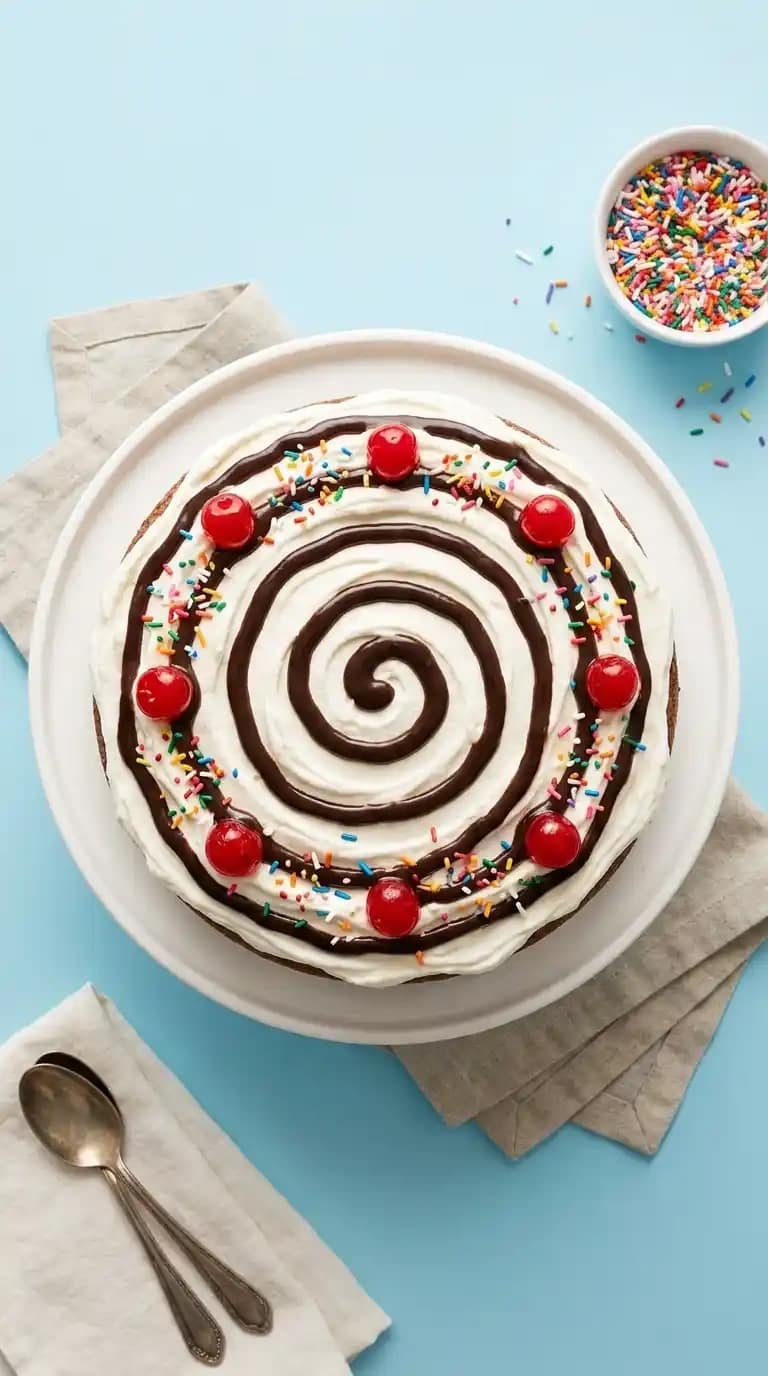
Remove the cake from the freezer and work quickly to add your decorations before the whipped cream softens too much. Drizzle warmed hot fudge sauce over the top in a loose pattern, then scatter sprinkles, crushed Oreos, or chopped nuts across the surface. Place maraschino cherries on top if using.
Return the finished cake to the freezer until 10 minutes before serving, since pulling it out slightly early makes slicing dramatically easier than cutting into a rock-solid frozen cake. Use a sharp knife run under hot water and dried between each cut for the cleanest slices.
Ice Cream Cake Ideas and Variations
Brownie Ice Cream Cake
Double down on chocolate by using chocolate fudge ice cream in both layers and adding a layer of crushed Oreos between them for a brownie ice cream cake that leans fully into the chocolate lover territory. Top with chocolate whipped cream made by adding 2 tablespoons of cocoa powder to the cream before whipping.
Easy Ice Cream Sandwich Cake
For a genuinely effortless ice cream sandwich dessert version, skip the brownie base entirely and line the bottom of the pan with store-bought ice cream sandwiches pressed flat side down. Layer softened ice cream on top and freeze exactly the same way for an easy ice cream sandwich cake that takes about 10 minutes of active prep time.
Icebox Cake Style
Layer crushed graham crackers or wafers between the ice cream layers instead of brownies for an icebox cake inspired version that’s lighter and crunchier. The crackers absorb moisture from the ice cream as it freezes and soften into something almost like a cookie layer.

Birthday Dessert Ice Cream Cake Everyone Loves
12
servings30
minutes6
hoursThis homemade ice cream cake layers a fudgy brownie base with vanilla and chocolate ice cream separated by a hot fudge ripple, frozen solid, then frosted with fresh whipped cream and decorated with sprinkles and cherries. Built in layers and frozen overnight, it delivers the best ice cream cake every time.
Ingredients
For the brownie base:
1 box (18 ounces) brownie mix, plus ingredients listed on the box
cooking spray for the pan
For the ice cream layers:
1.5 quarts vanilla ice cream, softened
1.5 quarts chocolate ice cream, softened
1/2 cup hot fudge sauce, warmed slightly
For the whipped topping:
2 cups heavy whipping cream
3 tablespoons powdered sugar
1 teaspoon vanilla extract
For decoration:
1/4 cup hot fudge sauce, for drizzling
rainbow sprinkles or crushed Oreos
maraschino cherries
chopped nuts, optional
Directions
- Grease a 9-inch springform pan and line the bottom with parchment paper
- Prepare and bake the brownie mix according to package directions until just slightly underdone
- Cool the brownie base completely in the pan, about 45 minutes to 1 hour
- Soften vanilla ice cream at room temperature for 8 to 12 minutes until spreadable
- Scoop and spread the vanilla ice cream evenly over the cooled brownie base
- Drizzle warmed hot fudge sauce over the vanilla layer in thin ribbons
- Cover and freeze for 1 hour until the vanilla layer is completely firm
- Soften chocolate ice cream while the first layer freezes
- Spread the softened chocolate ice cream evenly over the firm vanilla layer
- Press plastic wrap gently against the surface and freeze for 4 hours or overnight
- Beat heavy cream with powdered sugar and vanilla until firm peaks form
- Remove the pan from the freezer and run a knife around the edge before releasing the springform
- Spread whipped cream over the entire top and sides of the frozen cake
- Return to the freezer for 30 minutes to firm the whipped cream
- Drizzle hot fudge, add sprinkles, and place cherries on top
- Return to the freezer until 10 minutes before serving
- Slice with a hot knife wiped clean between each cut
Common Mistakes to Avoid
Not freezing between layers: Skipping the mid-freeze causes both flavors to blend at the border, eliminating that clean layered look when the cake is sliced.
Using ice cream that’s too soft: Ice cream that’s melted too far spreads unevenly and doesn’t set into firm distinct layers. It should feel like firm peanut butter, not liquid.
Slicing straight from the freezer: A fully frozen cake is nearly impossible to slice cleanly. Pull it out 10 minutes before serving and use a knife warmed under hot water.
Adding decorations to warm whipped cream: Decorations sink into soft whipped cream instead of sitting on top. Always re-freeze the frosted cake before decorating.
FAQs
Q1: How far ahead can I make a homemade ice cream cake?
Make it up to 1 week ahead and store tightly wrapped in the freezer. Add the whipped cream and final decorations the day before serving for the freshest presentation.
Q2: What are the best ice cream flavor combinations?
Vanilla and chocolate is the most universally loved combination. Cookies and cream paired with mint chocolate chip, or strawberry paired with vanilla, both work beautifully as ice cream cakes homemade flavor ideas.
Q3: Can I make this without a springform pan?
Yes, use a regular 9-inch round pan lined with plastic wrap hanging over the edges. Use the plastic wrap overhang to lift the cake out cleanly before frosting.
Q4: How do I store leftover ice cream cake?
Wrap leftover slices individually in plastic wrap and store in the freezer for up to 2 weeks. Individual wrapping prevents the cut surfaces from forming ice crystals.
Q5: Can I use Cool Whip instead of homemade whipped cream?
Yes, Cool Whip works well as a substitute and actually holds its shape slightly longer than homemade whipped cream in the freezer. Use about 2 cups of thawed Cool Whip as a direct swap.
Q6: What makes this the best ice cream cake compared to store-bought?
Homemade gives you full control over ice cream flavors, base type, and toppings, and typically uses higher-quality ingredients than commercial versions. IMO the brownie base alone makes this dramatically better than the standard cookie crumb crust most store-bought cakes use.
Wrapping It Up
This ice cream cake recipe delivers a genuinely stunning, crowd-pleasing birthday dessert through a fudgy brownie base, carefully layered ice cream, a hot fudge ripple, and a whipped cream finish. Freeze between every layer, work quickly when frosting, and pull it out 10 minutes before slicing. Those habits make the difference between a clean, beautiful cake and a melted mess.
Whether you go classic chocolate and vanilla, all-chocolate brownie style, or the shortcut ice cream sandwich version, this recipe consistently impresses. Now go soften that ice cream and start layering.